Monday, June 29, 2015

BFTPqal Week 26

Welcome to week 26 of The Blocks From the Past Quilt Along!

(If you would like to post this button to your blog, feel free to use this graphic and here is the link address to use with it- http://myquiltdiet.blogspot.com/2015/01/blocks-from-past-qal.html)


This week we are headed over to Katie's place for pages 87, 88, & 94 over at ocouss.blogspot.com


Click HERE to go back to the Schedule Post. Be sure to tag your progress on Instagram with #BFTPqal.  You can also join our Flickr group HERE.
Monday, June 22, 2015

#BFTPqal Week 25

Welcome to week 25 of The Blocks From the Past Quilt Along!

(If you would like to post this button to your blog, feel free to use this graphic and here is the link address to use with it- http://myquiltdiet.blogspot.com/2015/01/blocks-from-past-qal.html)


This week we are Staying right HERE for pages 56, 86, & 93!
YIPPEE!!!

*** Basic tip-  USE VERY SCANT 1/4" seam allowances and trim up your pieced components of each block.

First up, Hope of Hartford page 56.


I followed the instructions in the book.


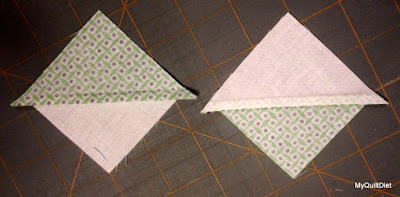
Be sure to square these up in this direction, as shown, trimming the larger solid triangle.


Next up, Acorns and Oak Leaves on page 86.

It's time to get your applique on!


I started out using a template needle turn applique method, but soon gave up and went with the template free back basting needle turn applique method that I love :)
HERE is an awesome tutorial of the method from Tropical Applique.  HERE is another super slick tutorial by Applique Addict.


You can see my back basting stitches in the photo above on the bottom right leaf.


Now to add the nuts.  I used template needle turn for this.


...but low and behold, my nuts were in the wrong place :(


That's better!


The center piece was a bit weird.  Because I enlarged this block to 12", I had to make up my own center piece template.  That did't work, so I just drew some lines on the fabric and basted it in place.


Finally the little nut husk cap things and FINITO!


I have a love hate thing going with this block.  Mostly hate. :/

Last up, Mariner's Compass on page 93.

***I made my background really big so I wouldn't have to applique the center to a large block.***
I made sure that  my papers were cut big enough to help me make sure the back ground would be big enough to make the 6" finished square.


You will need to make four copies of the template.  I like the Ikea art easel paper.  Some people like velum or tissue paper.  I was lazy and used the regular copy paper in my printer :)


I precut my fabric for ease of piecing.  I find cutting a large rectangle in half works great for paper piecing.


The book has good instructions on how to foundation piece.


You can find a BAZILLION  tutorials HERE.


I took pictures all of the way through to give you some visuals :)


(see how my grey covers the whole piece of paper)


When you piece your quadrants, you will need to make sure that the circles line up on the back.


Lastly, add an applique center :)


Click HERE to go back to the Schedule Post. Be sure to tag your progress on Instagram with #BFTPqal.  You can also join our Flickr group HERE.

Monday, June 15, 2015

#BFTPqal Week 24

Welcome to week 24 of The Blocks From the Past Quilt Along!

(If you would like to post this button to your blog, feel free to use this graphic and here is the link address to use with it- http://myquiltdiet.blogspot.com/2015/01/blocks-from-past-qal.html)


This week we are headed over to Tiffany's place for pages 55, 84, & 92 over at Sewinsomethin.blogspot.com


Click HERE to go back to the Schedule Post. Be sure to tag your progress on Instagram with #BFTPqal.  You can also join our Flickr group HERE.

Monday, June 8, 2015

BFTPqal Week 23

Welcome to week 23 of The Blocks From the Past Quilt Along!

(If you would like to post this button to your blog, feel free to use this graphic and here is the link address to use with it- http://myquiltdiet.blogspot.com/2015/01/blocks-from-past-qal.html)


This week we are headed over to Natalie's place for pages 53, 83, & 91 over at natalie-ever-after.blogspot.com


Click HERE to go back to the Schedule Post. Be sure to tag your progress on Instagram with #BFTPqal.  You can also join our Flickr group HERE.

Friday, June 5, 2015

The Sawdash Tutorial


First off, always start off every project with your favorite drink!


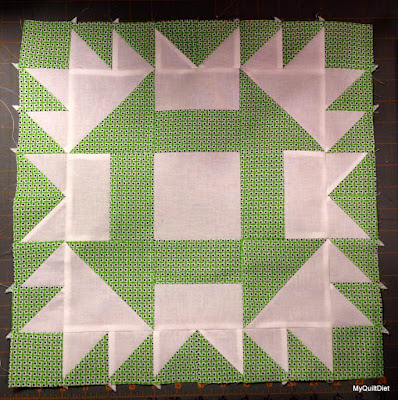
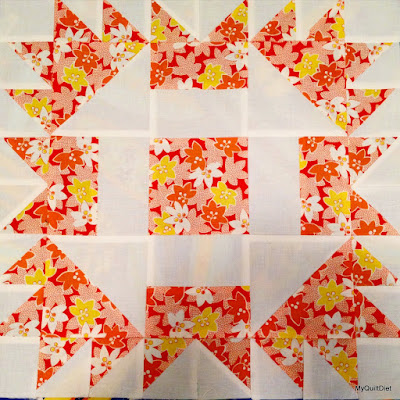
I designed this block originally for our Red & White Modern Block swap.  Blogged HERE.

I have been obsessed with the churn dash block and bear paws.  They just needed to be married :)


Here are your cutting instructions for a 16" finished blocks.

There are two different cutting instructions.  One for the blocks with the white churn dash and separate cutting instructions for the print churn dash.


White Churn Dash center cutting instructions:
White fabric- 4- 2.5"x 4.5" rectangles
4- 2.5" squares
2- 5" squares
3- 5.75" squares
Print fabric- 4- 2.5"x 4.5" rectangles
1- 4.5" square
2- 5" squares
3- 5.75" squares


Print Churn Dash center cutting instructions:
Print fabric- 4- 2.5"x 4.5" rectangles
4- 2.5" squares
2- 5" squares
3- 5.75" squares
White fabric- 4- 2.5"x 4.5" rectangles
1- 4.5" square
2- 5" squares
3- 5.75" squares


The first thing to do is to pair up your white and print 5.75" blocks.  One white, one print, right sides together.   Now pair up your 5" blocks, the same way.


For your 5" squares, draw one diagonal line across the back side of the white blocks.


For your 5.75" pairs, draw a diagonal line in each direction, so two, intersecting, diagonal lines.
(this is pictured below, but hard to see).  For more clarification see THIS method found HERE.


Now stitch a SCANT quarter inch seam on either side of each line.


Also, pair up your 2.5" x 4.5" rectangles.  Press to one side.


Treat your 5" squares as you would for a normal half square triangle, squaring up to 4.5"


For the 5.75", press to set seams and cut as seen above FIRST and then as seen below second.


The 5.75" squares make 8 little hst's.  Square these little cuties to 2.5"
Pressing note: Out of the 24- 2.5" hst's, be sure that four of them have their seams pressed the opposite direction as the rest.


I love all of the little strings left after squaring up hst's.


I recommend trimming the dog ears off of your hst's, although, I do not heed my own advice!


Now to put the blocks together.


Here is a photo gallery of the assembly,


Four of the little 2.5" hst's need to be pressed to opposite direction of the rest.


The four 2.5" hst's that are pressed opposite of the rest will form one side of the flying geese down the center.


I strongly recommend pressing as shown below.


Now for the opposite block!


I recommend pressing as shown in photos.


(The reason I recommend pressing this way, is that as your put the blocks together as rows,
 you can lock the seams to make a better match.)


This beauty is 96" by 96".


The fabic is Mimosa.


I used the entire fat quarter bundle,


There is not a single fabric repeat. 


I love it!


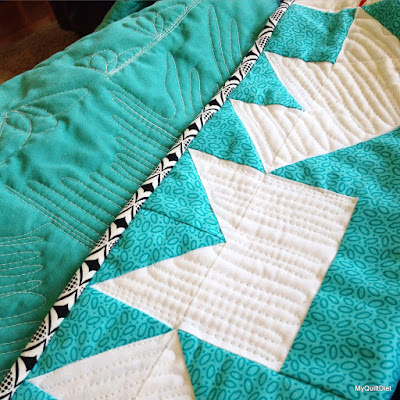
I even quilted it myself on my new (to me) longarm.


This is a gift for my daughter for High School graduation.