
First off, always start off every project with your favorite drink!

I designed this block originally for our Red & White Modern Block swap. Blogged HERE.
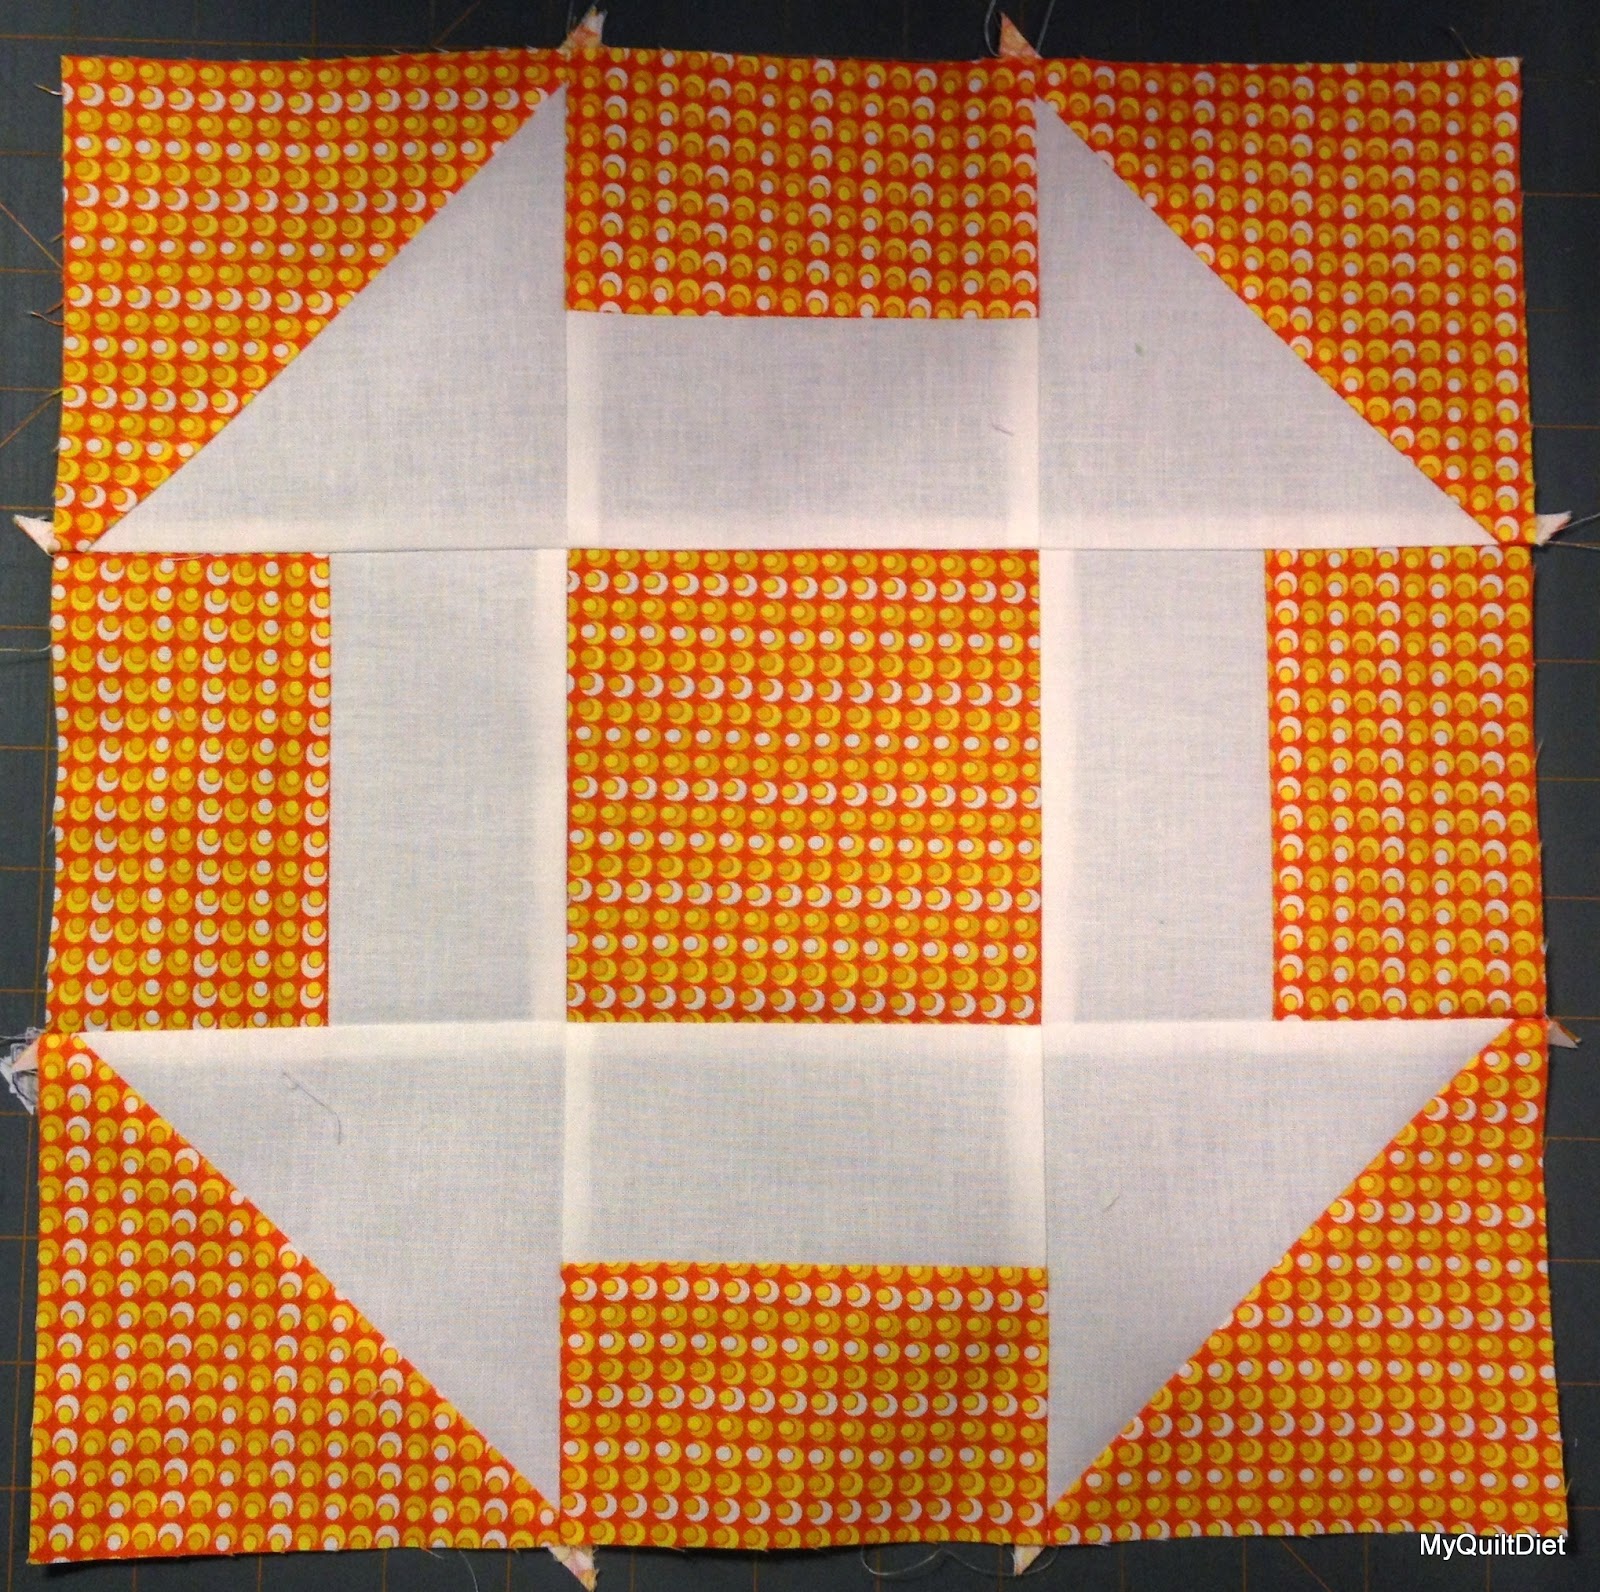
I have been obsessed with the churn dash block and bear paws. They just needed to be married :)

Here are your cutting instructions for a 16" finished blocks.
There are two different cutting instructions. One for the blocks with the white churn dash and separate cutting instructions for the print churn dash.

White Churn Dash center cutting instructions:
White fabric- 4- 2.5"x 4.5" rectangles
4- 2.5" squares
2- 5" squares
3- 5.75" squares
Print fabric- 4- 2.5"x 4.5" rectangles
1- 4.5" square
2- 5" squares
3- 5.75" squares

Print Churn Dash center cutting instructions:
Print fabric- 4- 2.5"x 4.5" rectangles
4- 2.5" squares
2- 5" squares
3- 5.75" squares
White fabric- 4- 2.5"x 4.5" rectangles
1- 4.5" square
2- 5" squares
3- 5.75" squares

The first thing to do is to pair up your white and print 5.75" blocks. One white, one print, right sides together. Now pair up your 5" blocks, the same way.

For your 5" squares, draw one diagonal line across the back side of the white blocks.

For your 5.75" pairs, draw a diagonal line in each direction, so two, intersecting, diagonal lines.

Now stitch a SCANT quarter inch seam on either side of each line.

Also, pair up your 2.5" x 4.5" rectangles. Press to one side.

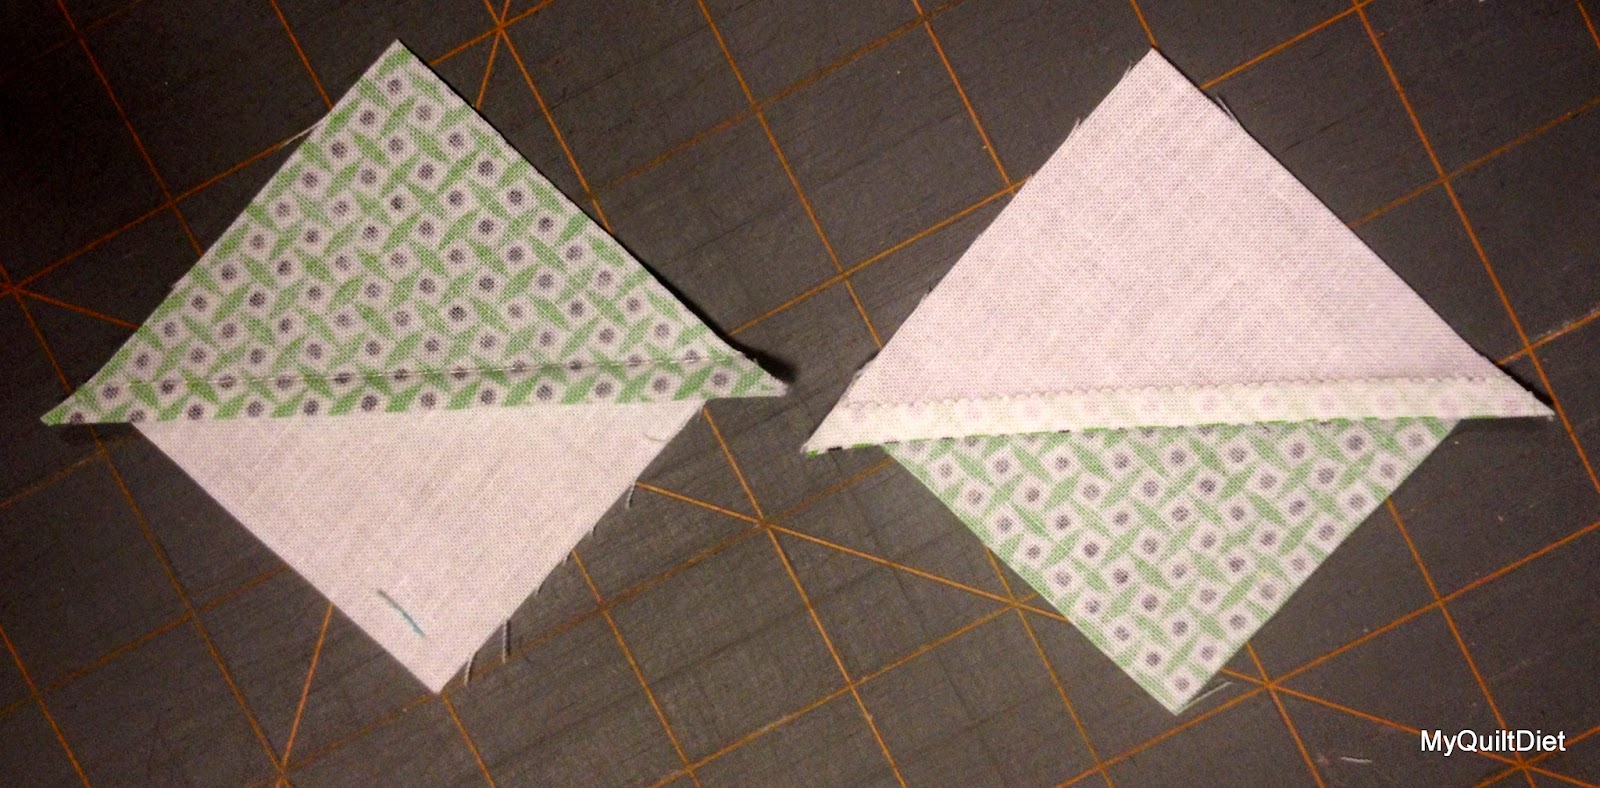
Treat your 5" squares as you would for a normal half square triangle, squaring up to 4.5"

For the 5.75", press to set seams and cut as seen above FIRST and then as seen below second.

The 5.75" squares make 8 little hst's. Square these little cuties to 2.5"
Pressing note: Out of the 24- 2.5" hst's, be sure that four of them have their seams pressed the opposite direction as the rest.

I love all of the little strings left after squaring up hst's.

I recommend trimming the dog ears off of your hst's, although, I do not heed my own advice!

Now to put the blocks together.

Here is a photo gallery of the assembly,


Four of the little 2.5" hst's need to be pressed to opposite direction of the rest.

The four 2.5" hst's that are pressed opposite of the rest will form one side of the flying geese down the center.


I strongly recommend pressing as shown below.


Now for the opposite block!


I recommend pressing as shown in photos.


(The reason I recommend pressing this way, is that as your put the blocks together as rows,
you can lock the seams to make a better match.)


This beauty is 96" by 96".

The fabic is Mimosa.

I used the entire fat quarter bundle,

There is not a single fabric repeat.

I love it!

I even quilted it myself on my new (to me) longarm.


This is a gift for my daughter for High School graduation.


Beautiful quilt, and great job on the quilting!
ReplyDeleteStunning!
ReplyDeleteThey were meant to be together! Cute pattern.
ReplyDeleteOh. My. Goodness. I am so making this...someday soon. I love the Churn Dash and Bear Paw too. Never, ever thought to pair the two. Beautiful quilt.
ReplyDeleteblessings, jill
I really be grateful for your blog,Private tutor Bethesda you have completed the great job. Thanks for the bunch of excellent resourceful site.
ReplyDeleteThis is so beautiful! And your quilting is nothing short of gorgeous, too!
ReplyDeleteThis is a great post, thanks for writing it
ReplyDelete