Thursday, January 30, 2014

DewberryCrush Diaper Bag

Here is the diaper bag version of the Temple Bag I made for my daughters, sister-in-law.  It is super cute!!!


TOO many pictures for your viewing pleasure :)


I LOVE this Notting Hill poppy print.


Pockets for cell phones and keys or binkies or whatever :)


Aren't those pink bunnies CUTE!!!


The inside.


This divided grey bunny pocket is an addition that I find useful in a diaper bag. *Instructions at the bottom*


Side bottle pockets.


Inside zipper pocket.


The back side :)


The back zipper pocket.


And finally the strap :)  I officially LOVE this bag!!!


Because I made this bag with what I had on hand from the Joel Dewberry windfall, I needed to modify the size.  It is the PERFECT size.  Here are my modifications.  All measurements are the cut size, unless otherwise noted as a finished size.

Measurements:
Exterior 19-1/4" x 27-3/4"
2 large inside pockets 13-1/2" wide x 22" high
front pocket finished size 7.5" x 12"
bottle pockets 8" x 17"
flap finished size 12-3/4" x 16"
finished size for the additional  shorter divided pocket on the inside 5-1/2"x 12-1/2" *

*to add this pocket, place the finished shorter pocket on top of the finished larger one and top stitch the dividing seam down the middle of the shorter pocket, THEN top stitch the whole unit into the interior lining to form the large pocket.

Monday, January 27, 2014

Temple Bag QAL Diaper Bag Modifications

So, for the diaper bag you are going to make everything the same except, you are going to make two more pocket, as shown below :)  These pockets go in the sides of the bag for holding bottles :)

**** this step is done right after the interior bag's sides have been sewn but the corners have not been formed yet, but you have marked them :)****

Cut your pocket fabric ~9"x17" ...it can be a bit longer or a bit wider, you will see that slight variations wont matter.  You will need two of these.

Cut a piece of pellon to fit half way across the pocket ~10'x8" ;)  Press in place.


Fold in half and press.


Now, put the pocket rights sides together and sew down the two sides, but leave the bottom open.


Clip the top corners.


Now you can turn it right side out and press.


You need to find and lightly mark the center of the bottom.  You can measure or...


Just fold it in half, as I have done and finger press the center :)


I am not exactly sure how to describe this next part :(  You need to make a pleat in the center bottom, so that the total width of the bottom is under 5".


Here you can see that it is just about four inches wide.


Here it is just under 4"... it is not going to matter too much, it just needs to be smaller than 5" and not too much smaller than 4" :D


Tack down your pleat with a scant 1/4" seam.


Before this next part, you need to have drawn your corner lines on the bag interior. ...but DONT SEW IT UP!!!


The bottom is tacked and you will need to pin the pleat together up higher on the pocket.


Now carefully insert the pleated pocket end into the corner a good 1/2-3/4 inch.


From the outside, feel to make sure the pocket is in far enough all of the way across.  You may pin if you like.  Then sew across the line.


Your corner pocket will be firmly in place now.


Do this for both sides.


Now turn your interior right side out.


Pin the top corners of the pocket in place.


Now for the SUPER FUN part!  NOT!  You are going to need to snuggle your bag  onto/upto your machine and top stitch the pockets down.


It is a bit tricky and irritating!  You will likely not be able to top stitch all the way to the bottom seam.  I figure that is good so any crumbs will  fall out :)


See!  Not so bad!  Take you time and try not to swear ;D


Now you can proceed back with the regular bag assembly instructions :)

***The measurements for this bag are slightly different than for the temple bag (the lady this bag is for wanted this fabric and I only had a little bit, so I modified)  The measurements I used will be posted later this week.  HERE

Check the schedule for the QAL HERE.  Visit all post's tagged Temple Bag Qal HERE

**** As a special side note, if you live anywhere close to Payson, Utah, we will be doing this project together on the last Thursday of January.  Please message me if you would like information about coming to sew with us :)  No creepy murderers, please ;D

***One of my quilty BFF's is an Embroidery Guru!  She has templates for many of the LDS temples :)  She will embroider an LDS temple for your bag, if you'd like :)  It is $5 if she already has the template, and $10 if she needs to order it.  Please leave me a comment, if you are interested.  Be sure that you are not a "no reply blogger" or I cannot get your info to her :(  If you are not sure if you are a "no reply blogger" please include your email in your comment.  One hint that you might be a "no reply blogger" is if I never reply to your comments :(:::.....

Thursday, January 23, 2014

Aly's Birthday Purse

My baby sister had a birthday and NEEDED a new bag :)


She likes bright primary colors.


This colorway of Notting Hill is PERFECT!!!


I NEED a bag like this one :)


Super fun!


Super Cheerful!


Perfect for Portland, Oregon!


I am loving the flap with a snap ;D


Monday, January 20, 2014

Temple Bag QAL Bag Assembly

Are you ready to sew this baby up?  (If you are doing a diaper bag, wait until next week, I will be posting modifications)

****edited to add in the flap instruction.  I am sorry I omitted it :(***

First things first :)  You need to add your flap to the back side of the bag exterior (the side that has the zipper pocket in it :)

Place your flap and the back of your exterior, right sides together.  Center your flap and place it 2-1/4" inches down from the top edge of the exterior.


Sew it into place using a 1/4" seam.


Zig-zag stitch along the edge as seen above.


This is tricky to see, but fip your flap over and top stitch it down.


Take care to make sure that the little edges at the end of each seam don't show ;D

***Take care to keep the flap out of the way during the rest of the bag assembly***

  Now, take your exterior and sew up the sides :)  Use a 1/2" seam allowance.


Before you do the same to your interior, please trim a 1/2 inch off of each end (the end right about the big pockets).


Once you have done that, you may sew up ONE of the sides of the interior all of the way, and the other side, leave a 4" opening in the seam in the middle of the side, like so...


This next part is a little tricky to explain...  We need to make sure that the side seams for the exterior and interior line up... so that the opening is the same size.  Lay your exterior on top of the interior and see if the side seams line up, like shown in the two pictures below.  If one of the bags seam is off, just take in one of the bags side seam, until they are the same :)


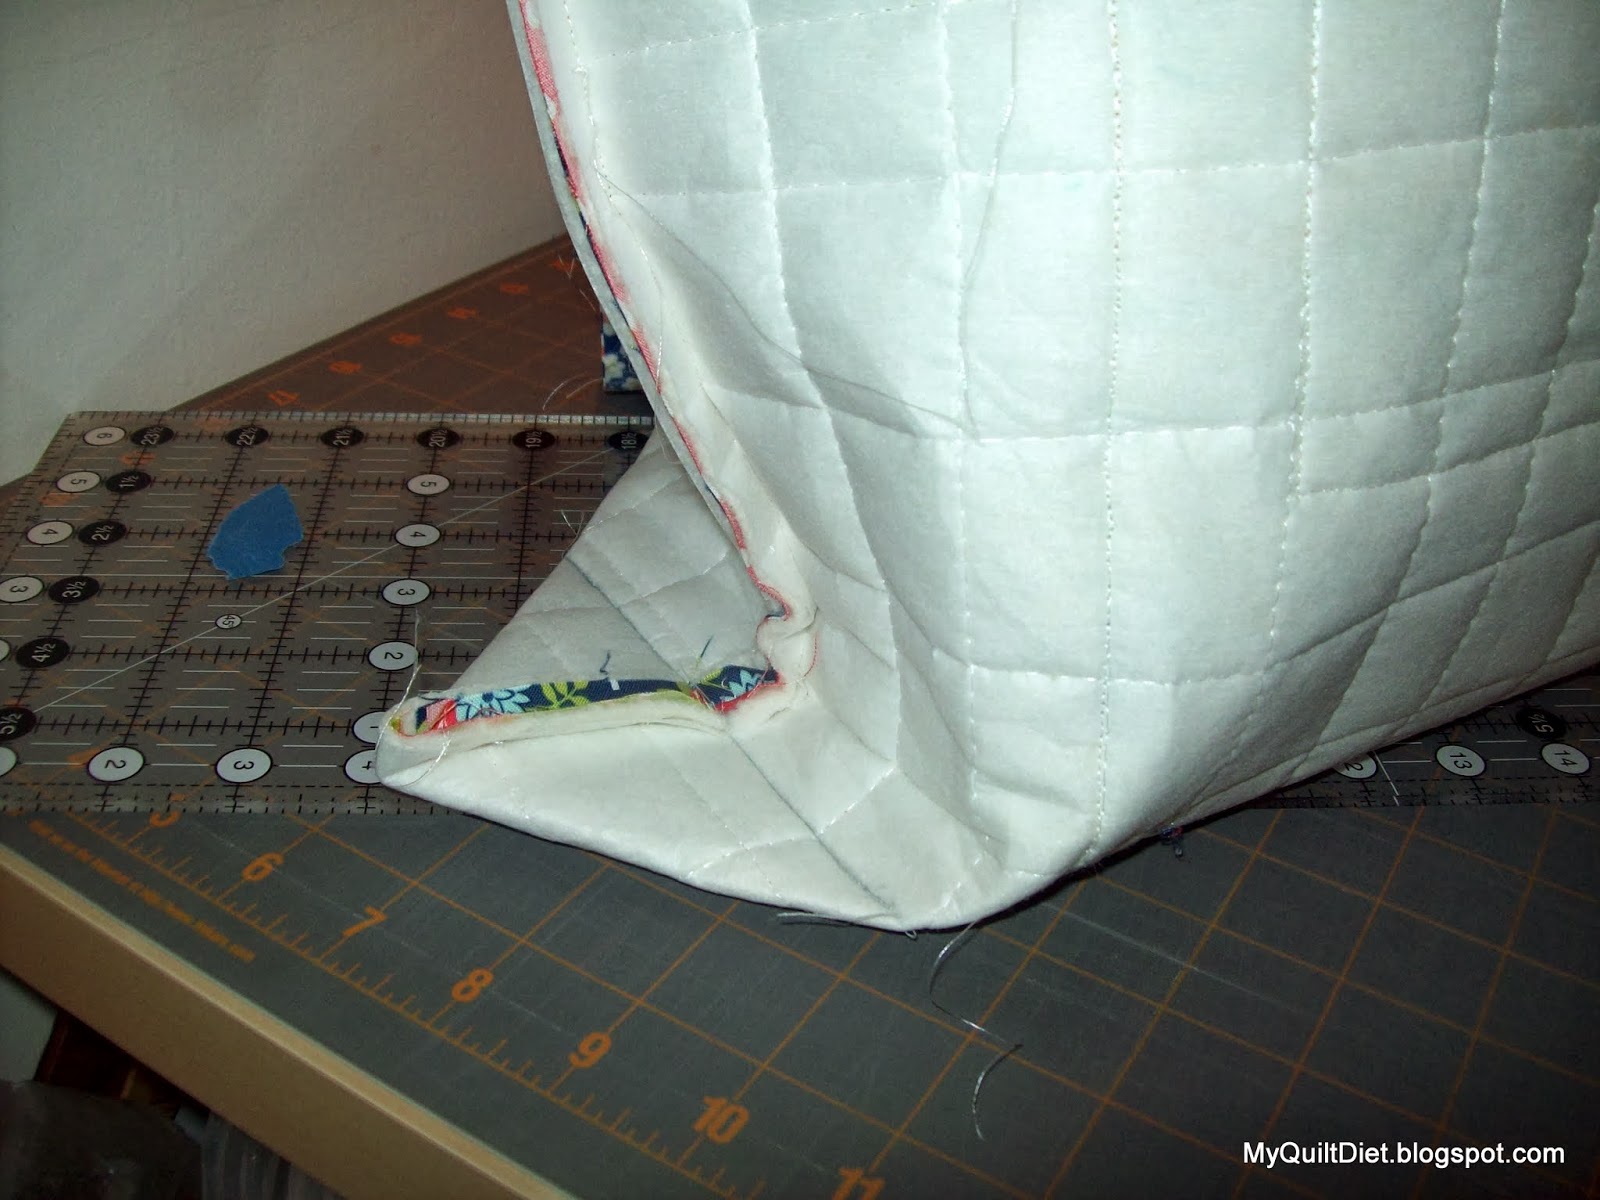
Now for the bottom corners.  Now take both the interior and exterior and do the same thing on both.


Lay the bag corner flat, and put a ruler on it as shown above.  The point of the triangle should hit the 2-3/4" mark and the bottom of the ruler should form a nice even triangle ;D


Draw a line as seen above.  Sew along this line for all four corners (two on the exterior and two on the interior)  For the exterior corners, I reinforce the seam by back stitching several times at the beginning and the end of the seam.


(Some people cut off the triangle tabs, I do not.  I have been making bags for a very long time, and leaving the triangles seems to lend strength to the bags bottom corners.)


Now you need to have the exterior in side out, and the interior, right side out :)


Now take your exterior and pin the strap in place.


The side of the strap that you want to show the most, should be touching the exterior of the bag.  Be sure that at least 1.5" of the strap extends past the edge.  Take great care that the strap does not get twisted :/  Once it is pinned in place, shove all of the strap down in the bag, out of the way. 

Now you may place the interior into the exterior. 


 Their right sides will be touching.


The strap will be under the interior, pinned in place.


Now carefully pin the top edge.


Sew all of the way around with a 1/2" seam.  Go slow.  You may want to use a 90 or 100 size needle as you are sewing through TONS of layers.


Once you are all of the way around, go back and do a little zig-zag reinforcement on the strap.


Now turn your bag through the side seam that you left in the bag interior.


Once you are all tuned right side out, either hand stitch or machine stitch the opening. (I use a narrow zig-zag)


The final stitch is to do a 1/4" inch top stitch around the top of the bag.

\

You did it!!!  You are finished :)


On Instagram use #MQDtemplebagQAL and #MyQuiltDiet to share your progress:)

Check the schedule for the QAL HERE.  Visit all post's tagged Temple Bag Qal HERE

**** As a special side note, if you live anywhere close to Payson, Utah, we will be doing this project together on the last Thursday of January.  Please message me if you would like information about coming to sew with us :)  No creepy murderers, please ;D

***One of my quilty BFF's is an Embroidery Guru!  She has templates for many of the LDS temples :)  She will embroider an LDS temple for your bag, if you'd like :)  It is $5 if she already has the template, and $10 if she needs to order it.  Please leave me a comment, if you are interested.  Be sure that you are not a "no reply blogger" or I cannot get your info to her :(  If you are not sure if you are a "no reply blogger" please include your email in your comment.  One hint that you might be a "no reply blogger" is if I never reply to your comments :(:::.....